Surgical Technique Guide: Sinus Tarsi Approach for Calcaneal Fracture Fixation
Tyler A. Gonzalez, M.D.
Chief Resident, Foot & Ankle Service
Beth Israel Deaconess Medical Center
Harvard Medical School, Boston, MA
John Y. Kwon, M.D.
Chief, Foot & Ankle Service
Beth Israel Deaconess Medical Center
Harvard Medical School, Boston, MA
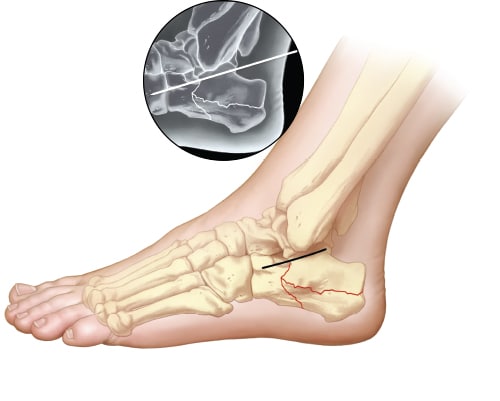
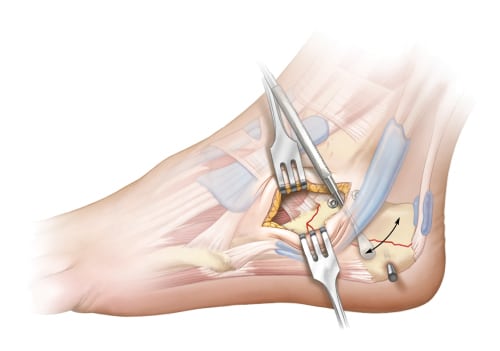
Incision used for sinus tarsi approach is 3-4 cm, made from the tip of the fibula toward the base of the fourth metatarsal. K-wire with fluoroscopic imaging can help identify appropriate incision placement if landmarks are difficult to palpate due to swelling.
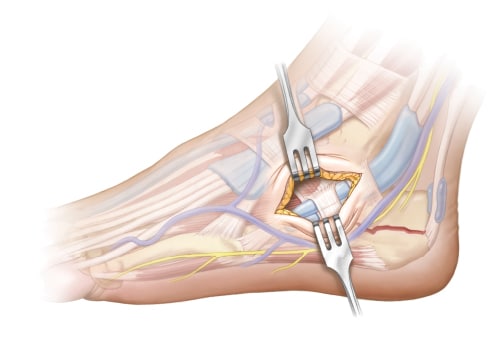
Bluntly dissect to avoid branches of the sural or superficial peroneal nerve and peroneal tendons, which usually lie inferior and posterior to dissection, but can be located directly in line with incision if dislocated. Excision of the calcaneofibular ligament and any capsular tissue is performed to help access the posterior facet. Remove any hematoma or irreparable fragments of free-floating articular cartilage from the joint.
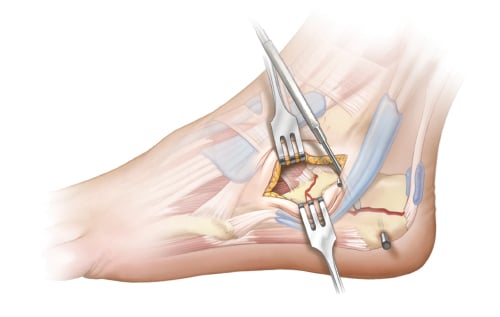
Next, reduction of the posterior facet is performed. A freer elevator can be placed inferiorly to help elevate the depressed posterior facet. Once reduced, K-wires are used to stabilize the posterior facet to the medial sustentacular fragment. After, heel length and varus malalignment must be addressed. A Steinmann pin can be inserted into the tuberosity from lateral to medial and used as a joystick to aid reduction. Additional K-wires are placed to hold the reduction.
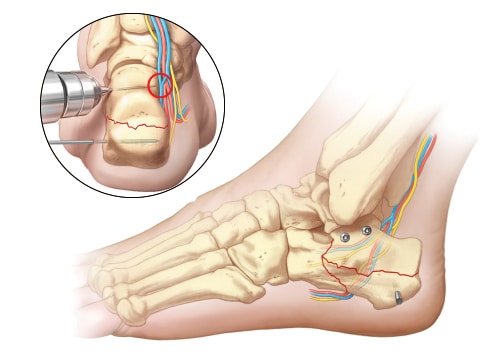
Place one or two 3.2-4.0mm cortical screws across the posterior facet to the tip of the sustentaculum to stabilize the articular fragment. If fracture comminution is minimal, screws can be placed in lag fashion. Positional screws should be used in more comminuted fractures (i.e. Sanders III or IV). Care should be taken to not plunge when drilling and to properly measure screw length to avoid iatrogenic injury to the neurovascular bundle or flexor hallucis longus tendon medially.
After anatomic reduction of the posterior facet and tuber is achieved, application of the plate is performed. Use a Cobb elevator to gently dissect subcutaneous tissues overlying the lateral wall to clear a path for plate placement. Fluoroscopy with elevator in place can be performed if need be to confirm extramedullary dissection on Harris Heel view.
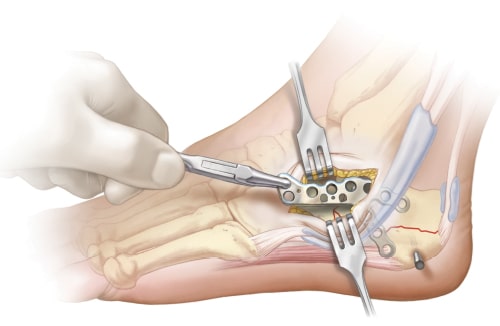
Grasp plate and insert through the incision. Temporarily hold plate with K-wire and confirm extramedullary placement via Harris Heel view.
Screws are inserted directly through the sinus tarsi approach for visible screw holes and percutaneously for those inaccessible through the approach using a perfect circle technique. Typically, screw fixation should be performed anteriorly and non-locking screws should be placed posteriorly in the tuber in order to address any residual varus deformity and pull the heel into proper axial alignment.
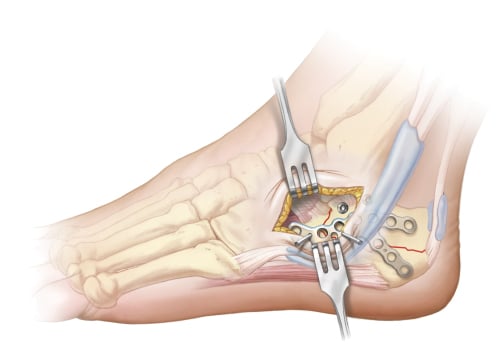
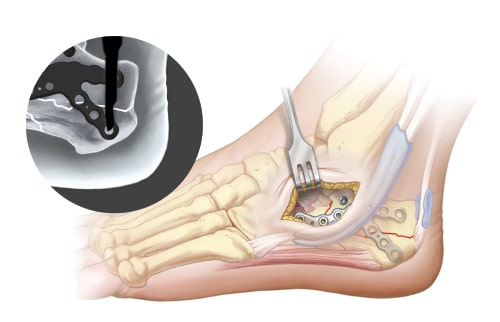
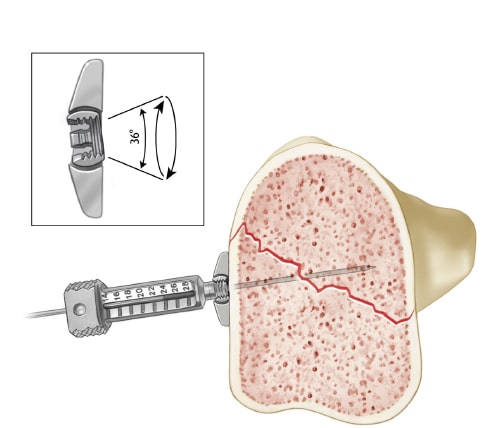
Using the variable angle bearing holes, aim guide to desired position between previously placed screws to support the posterior facet. Finger tighten guide to lock. Insert 1.1mm K-wire to confirm trajectory under fluoroscopy and to determine proper depth. Measure length using the wire gauge. Drill over K-wire with 2.1mm cannulated drill. Remove K-wire and insert 2.3mm peg. Repeat steps for additional pegs.
Confirm screws and pegs are fully seated.
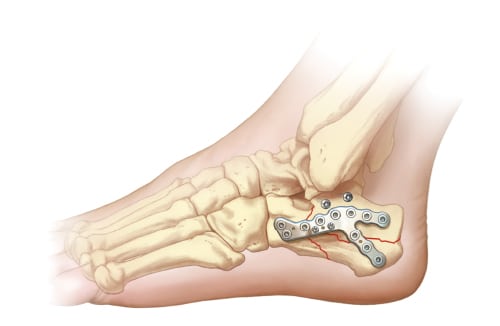
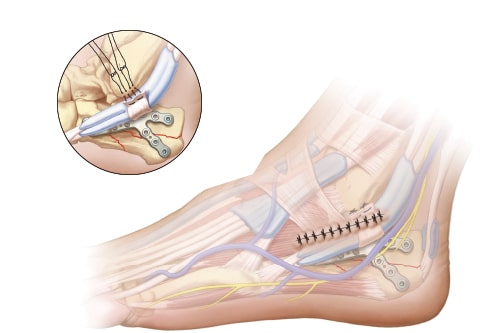
After plate fixation and final fluoroscopy images are obtained, one must assess peroneal tendon reduction. If the peroneal tendons are dislocated, the incision should be extended 2-3 cm along the posterior border of the fibula. Repair of the superior peroneal retinaculum can be performed by placing suture anchors into the posterolateral aspect of the fibula and repairing the retinaculum to the fibula with the tendons relocated into the fibular groove.
Perform standard wound closure.
Disclosure: The author did not receive any outside funding or grants in support of this work. Neither he nor a member of his immediate family received payments or other benefits or a commitment or agreement to provide such benefits from a commercial entity.