Surgical Technique Guide for 4-Corner Fusion
Alexander Y. Shin, M.D.
for his Hand Fellows and Residents
Professor and Consultant of Orthopaedic Surgery
Department of Orthopaedic Surgery, Division of Hand Surgery
Mayo Clinic, Rochester, MN
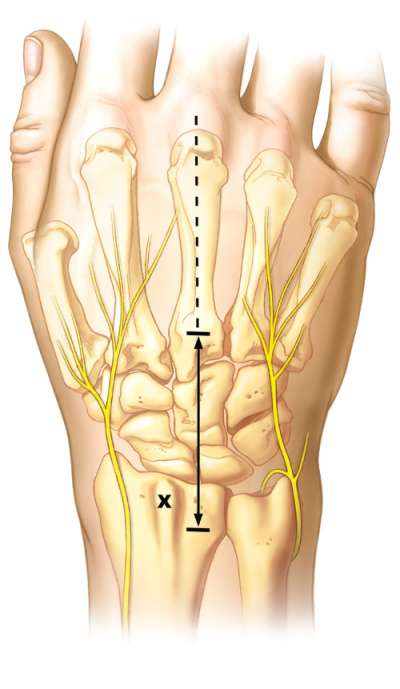
Under brachial tourniquet control, a longitudinal incision is made along the line of the 3rd metacarpal over the radiocarpal and midcarpal joints. Skin flaps are elevated, sensory nerves protected. The third extensor compartment is opened and the extensor policis longus is retracted radialward. An ulnarly based flap of retinaculum is created by dividing the septum between the 3rd and 4th, and 4th and 5th extensor compartments. The extensor tendons are retracted and a posterior interosseous neurectomy is performed.
A ligament sparing capsulotomy is made by making an incision along the radioscaphoid capsule, the dorsal radiocarpal ligament and intercarpal ligament. The radially based capsule flap is then elevated to expose the radiocarpal and midcarpal joints.
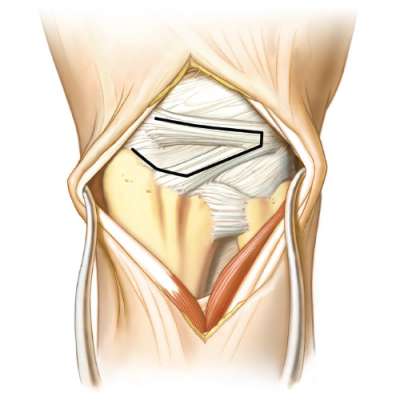
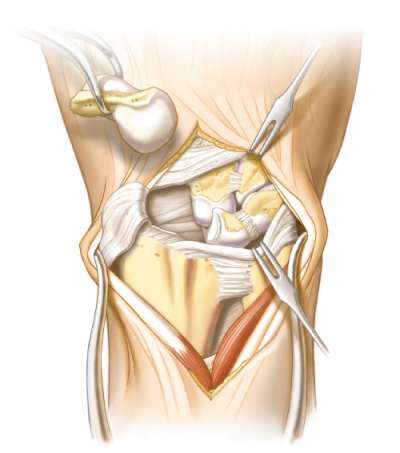
The articular surfaces of the radiocarpal joint are carefully examined. If the radiolunate articulation is without degenerative changes, one can proceed with scaphoid excision. The dorsal scapholunate ligament, membranous portion and volar ligament are sharply divided. Care is taken not to damage the radioscaphocapitate or long radiolunate volar ligaments. The scaphoid can be removed piecemeal or whole. Using sharp elevators, soft tissue attachments can be systematically elevated from the scaphoid until it is removed. The RSC and LRL must
be preserved!
Once the scaphoid is removed, the fusion sites are prepared. This is the most important part of this procedure. Meticulous decortication of cartilage of the capitolunate, capitohamate, triquetrohamate, and lunotriquetral joints must be performed. Use of a scalpel, curette, rongeur, osteotome or high speed burr
can facilitate this procedure.
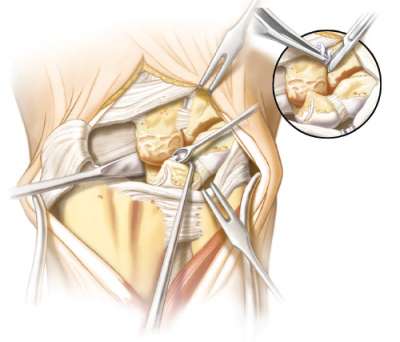
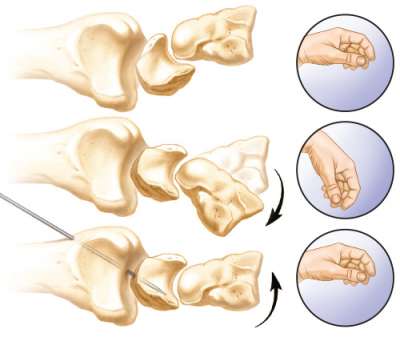
Correction of the DISI deformity (dorsal tilting of the lunate) is imperative to prevent dorsal radiocarpal impingement. Using a fluoroscope, a lateral image is obtained. The wrist is flexed until the radiolunate angle is neutral (0 degrees). A 0.0625” K wire is used to transfix the radius to lunate to maintain this relationship. The K wire should be place at an angle such that it is not in the way when the burr is used to prepare the bones for the Fusion Cup.
Copious amount of bone graft (autologous iliac crest is preferred) is packed in between the surfaces to be arthrodesed. A neutral capitolunate alignment is obtained under fluoroscopic image. A 0.625” K wire is then placed from the capitate to triquetrum, or alternatively from the hamate to lunate to maintain the neutral lateral alignment. Again the K wire is placed so that that it is not in the way when the dorsal burr is used.
Occasionally there is a type II lunate (lunate with a facet for the hamate). In these cases, the natural alignment causes the capitate to overhang the lunate slightly. If so allow the natural alignment of the capitate and hamate over the proximal row and transfix in this position.
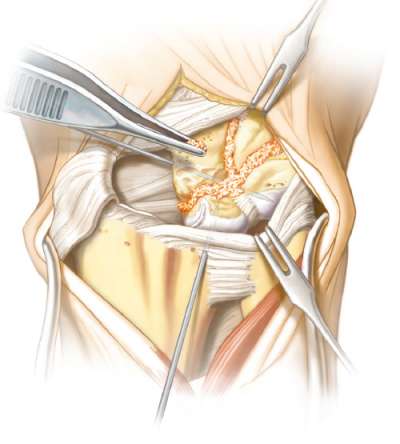
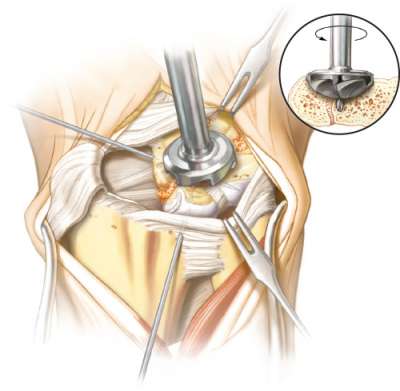
Once bone graft is packed into all areas, the alignment confirmed and the carpal bones have been transfixed with K wires, the bones are reamed. The reamer central position is chosen such that all four bones will be reamed as equally as possible. The depth of the reaming should be such that the Fusion Cup is sunk just below the edge of the dorsal cortex. If it is not, there will be plate impingement on the radius. Once reaming is complete apply bone graft with the cancellous autograft as needed.
Rotate Fusion Cup to maximize the number of screws in each bone. Whenever possible, two screws in each bone are preferred. Make sure the plate is sunk just below the dorsal cortex.
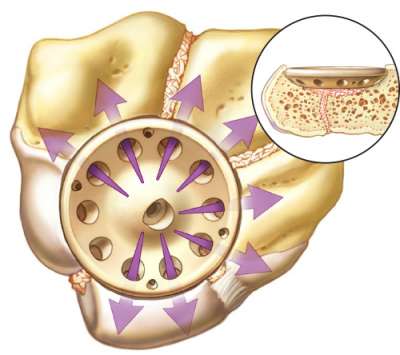
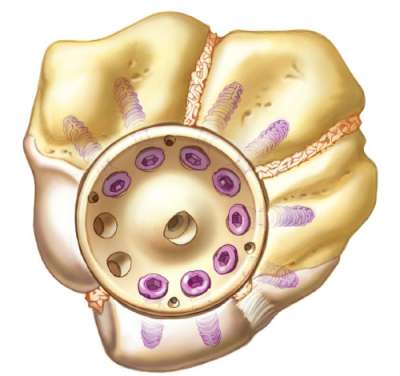
Drill, measure and insert screws but do not completely tighten screws until all screws have been inserted. Alternately tighten screws that are opposite to each other (illustrated) and bring screw head just flush with the Fusion Cup. Pay particular attention when placing screws into the triquetrum, since a long screw may result in pisotriquetral joint irritation.
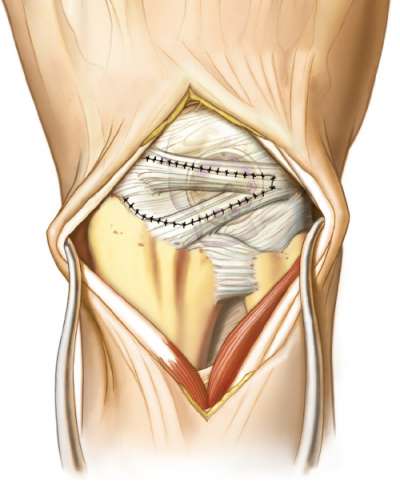
Once all screws are placed, final fluoroscopic images are obtained in multiple planes, in particular a view of the pisotriquetral joint to ensure the screw lengths are appropriate. Correct any screws that may result in pisotriquetral or radiocarpal irritation. The ligament sparing capsulotomy is closed with nonabsorbable sutures, and the retinacular flap is repaired with the extensor pollicus longus dorsally transposed.
Disclosure: The author did not receive any outside funding or grants in support of this work. Neither he nor a member of his immediate family received payments or other benefits or a commitment or agreement to provide such benefits from a commercial entity.